by
by 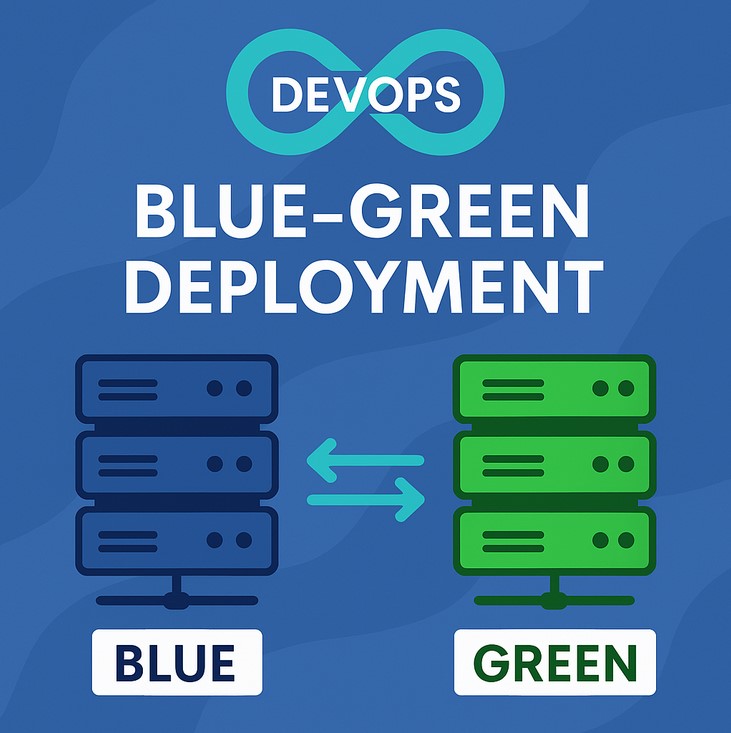
Introduction
In today’s fast-paced software development environment, delivering features without disrupting the user experience is crucial. One proven strategy is Blue-Green Deployment, a DevOps technique that ensures zero-downtime deployments. This blog post covers a hands-on approach to implementing blue-green deployments using AWS EC2 instances and a Load Balancer.
What is Blue-Green Deployment?
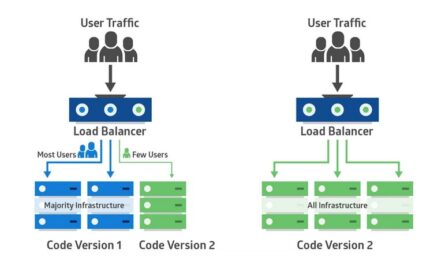
Blue-Green Deployment involves two identical environments: Blue (active/production) and Green (inactive/staging). At any time, only one environment serves live traffic. New updates are first deployed to the inactive environment. After successful testing, traffic is switched over.
Why Use Blue-Green Deployment?
- Zero Downtime: Minimize user disruption.
- Quick Rollback: Revert to the old version quickly.
- A/B Testing: Test new features in a real-world scenario.
- Better QA: Thorough validation before going live.
Prerequisites
- AWS account
- Basic knowledge of EC2 and Load Balancer setup
- SSH access to EC2
- A sample web app or static website to deploy
Architecture Overview
- 1 AWS Load Balancer
- 2 EC2 instances (Blue and Green)
+--------------------+
| AWS Load Balancer  |
+---------+----------+
          |
   +------+------+
   |             |
[Blue EC2]    [Green EC2]
Step-by-Step Implementation
Step 1: Launch EC2 Instances
Launch two EC2 instances:
- Name one as Blue Instance
- Name the other as Green Instance
Use Amazon Linux 2 AMI and allow ports 22, 80 in security group.
Step 2: Install Web Server on Both EC2s
SSH into each instance and run:
sudo yum update -y
sudo yum install httpd -y
sudo systemctl start httpd
sudo systemctl enable httpd
Create a custom index.html file for each:
On Blue EC2:
echo "<h1>Blue Deployment - Version 1.0</h1>" | sudo tee /var/www/html/index.html
On Green EC2:
echo "<h1>Green Deployment - Version 1.0</h1>" | sudo tee /var/www/html/index.html
Step 3: Create and Configure Load Balancer
- Go to EC2 Dashboard > Load Balancers
- Create an Application Load Balancer
- Add listeners on port 80
- Create a Target Group with protocol HTTP and attach both EC2s initially
Once ready, test by visiting the Load Balancer DNS to verify it’s routing traffic to both.
Deployment Process: Blue-Green in Action
Step 4: Initial Deployment to Blue
- Remove Blue EC2 from the Load Balancer Target Group.
- Now only Green is receiving traffic.
Let QA test Blue using the direct IP of the instance:
http://<BLUE-EC2-IP>
Once verified:
- Add Blue back to the Load Balancer.
- Now traffic is being served from the updated Blue version.
Step 5: Update and Deploy to Green
- Remove Green EC2 from the Load Balancer.
- Now only Blue EC2 is receiving traffic.
- SSH into Green EC2 and deploy the updated code:
echo "<h1>Green Deployment - Version 2.0</h1>" | sudo tee /var/www/html/index.html
Let QA test using the Green EC2 IP:
http://<GREEN-EC2-IP>
Once approved:
- Add Green to the Load Balancer.
- Remove Blue if needed or keep both (optional).
Benefits of This Practical Approach
- Manual control: QA can validate each version.
- Isolated testing: No interference with live traffic.
- Reduced risk: Easy rollback if errors are found.
Automating This Process
You can automate this workflow using:
- CI/CD tools: Jenkins, GitHub Actions, GitLab CI
- Infrastructure as Code: Terraform, CloudFormation
- Blue/Green strategy in ECS/EKS: For containerized apps
Conclusion
Blue-Green Deployment is a powerful DevOps strategy that provides safety, speed, and stability during application releases. By using AWS EC2 and Load Balancer, we can implement this process with minimal tools. It’s perfect for teams looking to enhance their deployment lifecycle with better testing and seamless rollouts.
Whether you’re a beginner or scaling your DevOps practices, this guide will help you get started with confidence.
Want to read more about Blue-Green Deployment. Click here
Recommended Reads
Let’s Connect
Did you try this setup? Have questions or want help automating this with a CI/CD pipeline? Drop a comment or reach out to collaborate!